![Danny Bird](https://skillest.imgix.net/QvxF4QC7FopDJ3df3_1738041729_B6837BF0-F098-40CE-8165-143EF11C377E.jpeg?w=1920&ar=16:9&fit=crop&auto=enhance,format)
About the coach
If you would like a 🆓 Swing Review, all you need to do is follow me on the app and message me”Free Review”. I offer UNLIMITED coaching for 💲9️⃣9️⃣per month. As a subscriber you will also have access to over 💯 Videos of additional drills. Currently 📹TURN AROUND TIME 24-48HRS📹 My goal is to get your lesson back to you promptly so you can get back to working on your game. Not only that, but as a Subscriber you will also have access to practice session review. I can assist in making sure your training is being done correctly and providing the most benefit to you possible. Hopefully you will see that my pricing is not only reasonable for the value you will be getting. If you’d like to start shooting lower scores and start practicing with purpose, please feel free to message me and let’s get started. ⬇️ For more about me and my coaching check the socials below⬇️ 💻www.dannybirdgolf.com 📱Instagram: dannybirdgolf 📱YouTube: dannybirdgolf 📱Facebook: dannybirdgolf 📱 TikTok: dannybirdpga I appreciate you taking the time to check my bio, please don’t hesitate to ask any questions. Cheers DB
Specialities
Sample Lesson
01.Original Videos
02.Analysis Videos
03.Other Videos
Videos
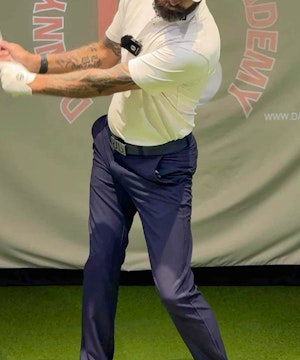
![Left Knee Kicking In (Too Much)](https://skillest.imgix.net/QvxF4QC7FopDJ3df3_1737782027_i_A74C1064-9A29-4C6B-A5F9-F881301AE25A.mov.jpeg?w=300&ar=5:6&fit=crop&auto=enhance,format)
Left Knee Kicking In (Too Much)
![The Downswing Sequence](https://skillest.imgix.net/QvxF4QC7FopDJ3df3_1737782027_i_9E6A6C69-9A80-43FA-8985-C4FD3902332C.mov.jpeg?w=300&ar=5:6&fit=crop&auto=enhance,format)
The Downswing Sequence
![Hooding The Clubface (Backswing)](https://skillest.imgix.net/QvxF4QC7FopDJ3df3_1737782027_i_065E48D2-1C50-4154-921D-9FE77DA76967.mov.jpeg?w=300&ar=5:6&fit=crop&auto=enhance,format)
Hooding The Clubface (Backswing)
![Left Knee Movement (Correct Move)](https://skillest.imgix.net/QvxF4QC7FopDJ3df3_1737782027_i_86B10427-FB27-4AD7-B20A-D425C16A6D85.mov.jpeg?w=300&ar=5:6&fit=crop&auto=enhance,format)
Left Knee Movement (Correct Move)
![Arm Position Flat (Backswing)](https://skillest.imgix.net/QvxF4QC7FopDJ3df3_1737782027_i_9D2DD0FF-8321-4D68-A136-743F87E155AC.mov.jpeg?w=300&ar=5:6&fit=crop&auto=enhance,format)
Arm Position Flat (Backswing)
![The Left Hip Movement (The Bump)](https://skillest.imgix.net/QvxF4QC7FopDJ3df3_1737782027_i_14CA6D7F-97FC-4513-A638-758278E0DF45.mov.jpeg?w=300&ar=5:6&fit=crop&auto=enhance,format)
The Left Hip Movement (The Bump)
![Correct Right Elbow Position (Downswing)](https://skillest.imgix.net/QvxF4QC7FopDJ3df3_1737782027_i_3A41954C-4F1E-49BD-B84E-9A00A56323D5.mov.jpeg?w=300&ar=5:6&fit=crop&auto=enhance,format)
Correct Right Elbow Position (Downswing)
![Hands Opening (Backswing)](https://skillest.imgix.net/QvxF4QC7FopDJ3df3_1737782027_i_21F74E70-2324-4752-B762-6D7374AFA886.mov.jpeg?w=300&ar=5:6&fit=crop&auto=enhance,format)
Hands Opening (Backswing)
![Left Hip Spinning (Downswing)](https://skillest.imgix.net/QvxF4QC7FopDJ3df3_1737782027_i_1D622295-6171-4B8B-9203-D0DC606BF86D.mov.jpeg?w=300&ar=5:6&fit=crop&auto=enhance,format)
Left Hip Spinning (Downswing)
![Right Elbow (Downswing - Pushing Away)](https://skillest.imgix.net/QvxF4QC7FopDJ3df3_1737782027_i_5BD28270-7FC8-4983-8C91-5DCD7B67FB0D.mov.jpeg?w=300&ar=5:6&fit=crop&auto=enhance,format)
Right Elbow (Downswing - Pushing Away)
![Left Arm Ideal (Backswing)](https://skillest.imgix.net/QvxF4QC7FopDJ3df3_1737782027_i_3CDCC32E-9D3B-447F-8797-4541231D9304.mov.jpeg?w=300&ar=5:6&fit=crop&auto=enhance,format)
Left Arm Ideal (Backswing)
![Left Shoulder Spinning (Downswing)](https://skillest.imgix.net/QvxF4QC7FopDJ3df3_1737782027_i_7B77A027-E968-4386-8CFA-EB808C6DAE00.mov.jpeg?w=300&ar=5:6&fit=crop&auto=enhance,format)
Left Shoulder Spinning (Downswing)
![High Hands and Arms (Backswing)](https://skillest.imgix.net/QvxF4QC7FopDJ3df3_1737782027_i_FD936D68-CAE4-4D5D-96EA-7CEC8B655CD7.mov.jpeg?w=300&ar=5:6&fit=crop&auto=enhance,format)
High Hands and Arms (Backswing)
![Hip Movement (Downswing- Too Much)](https://skillest.imgix.net/QvxF4QC7FopDJ3df3_1737782027_i_BB392B84-783B-4ABB-BB25-7FF8B79B0888.mov.jpeg?w=300&ar=5:6&fit=crop&auto=enhance,format)
Hip Movement (Downswing- Too Much)
![Right Elbow Behind Body (Downswing)](https://skillest.imgix.net/QvxF4QC7FopDJ3df3_1737782027_i_DDAD7737-A67C-491A-B2D1-16B248E613A2.mov.jpeg?w=300&ar=5:6&fit=crop&auto=enhance,format)
Right Elbow Behind Body (Downswing)
![Falling Towards the Ball (Backswing)](https://skillest.imgix.net/QvxF4QC7FopDJ3df3_1737782027_i_BC6AE23F-B5A2-4CC7-8B89-24FD68845DFC.mov.jpeg?w=300&ar=5:6&fit=crop&auto=enhance,format)
Falling Towards the Ball (Backswing)
![Head Tilt (Backswing)](https://skillest.imgix.net/QvxF4QC7FopDJ3df3_1737782027_i_FB36C646-4135-4964-9E70-A42AC7BF9AF7.mov.jpeg?w=300&ar=5:6&fit=crop&auto=enhance,format)
Head Tilt (Backswing)
![Creating Width (Backswing)](https://skillest.imgix.net/QvxF4QC7FopDJ3df3_1737769408_i_0A18DE17-2F7A-4A4A-A9DE-3C249C56F315.mov.jpeg?w=300&ar=5:6&fit=crop&auto=enhance,format)
Creating Width (Backswing)
![Lower Body Lateral Movement (Legs)](https://skillest.imgix.net/QvxF4QC7FopDJ3df3_1737769408_i_19ECE875-E9E0-4EF3-9505-8A2542BCEF89.mov.jpeg?w=300&ar=5:6&fit=crop&auto=enhance,format)
Lower Body Lateral Movement (Legs)
![Upper Body Lateral Movement (Backswing)](https://skillest.imgix.net/QvxF4QC7FopDJ3df3_1737769408_i_819579F7-D922-4F97-91EA-BEB8AB7D1D89.mov.jpeg?w=300&ar=5:6&fit=crop&auto=enhance,format)
Upper Body Lateral Movement (Backswing)
![Standing Up/ Getting Out of Posture (Backswing)](https://skillest.imgix.net/QvxF4QC7FopDJ3df3_1737769408_i_3D7A99D6-8BCC-4B68-981A-51F6F897F699.mov.jpeg?w=300&ar=5:6&fit=crop&auto=enhance,format)
Standing Up/ Getting Out of Posture (Backswing)
![Laid Off Position (Backswing)](https://skillest.imgix.net/QvxF4QC7FopDJ3df3_1737769408_i_20B32152-274C-4413-9E6E-BF432C06D1ED.mov.jpeg?w=300&ar=5:6&fit=crop&auto=enhance,format)
Laid Off Position (Backswing)
![Falling Towards the Target (Backswing)](https://skillest.imgix.net/QvxF4QC7FopDJ3df3_1737769408_i_48893426-7AEB-476C-A6C9-4292D82C030F.mov.jpeg?w=300&ar=5:6&fit=crop&auto=enhance,format)
Falling Towards the Target (Backswing)
![Under Rotation (Backswing)](https://skillest.imgix.net/QvxF4QC7FopDJ3df3_1737769408_i_8486309E-D933-49DE-A24E-36B15C6EB046.mov.jpeg?w=300&ar=5:6&fit=crop&auto=enhance,format)
Under Rotation (Backswing)
![Lateral Movement (Backswing)](https://skillest.imgix.net/QvxF4QC7FopDJ3df3_1737769408_i_8A5AEF07-25E8-4818-9A27-1AA1475CA10C.mov.jpeg?w=300&ar=5:6&fit=crop&auto=enhance,format)
Lateral Movement (Backswing)
![Width in the Downswing (P.5)](https://skillest.imgix.net/QvxF4QC7FopDJ3df3_1737769408_i_AABDA110-12A8-4DD1-BC75-DCA1A180D403.mov.jpeg?w=300&ar=5:6&fit=crop&auto=enhance,format)
Width in the Downswing (P.5)
![Rotation of Upper and Lower Body](https://skillest.imgix.net/QvxF4QC7FopDJ3df3_1737769408_i_DE95CCB9-E107-4362-B5EF-AA86B61451B2.mov.jpeg?w=300&ar=5:6&fit=crop&auto=enhance,format)
Rotation of Upper and Lower Body
![Early Extension (Downswing)](https://skillest.imgix.net/QvxF4QC7FopDJ3df3_1737769408_i_B2582A8A-D596-4FEF-A6DA-1008DC9F359F.mov.jpeg?w=300&ar=5:6&fit=crop&auto=enhance,format)
Early Extension (Downswing)
![Over Rotation (Backswing)](https://skillest.imgix.net/QvxF4QC7FopDJ3df3_1737769408_i_EC5A053E-7352-497F-9939-B619661363E9.mov.jpeg?w=300&ar=5:6&fit=crop&auto=enhance,format)
Over Rotation (Backswing)
![Flat Shoulder Turn](https://skillest.imgix.net/QvxF4QC7FopDJ3df3_1737769408_i_F9355E55-A957-4479-AA8C-AAAEAE5ECEC4.mov.jpeg?w=300&ar=5:6&fit=crop&auto=enhance,format)
Flat Shoulder Turn
![Wrist Positions at the Top of the Backswing](https://skillest.imgix.net/QvxF4QC7FopDJ3df3_1737532413_i_723D838E-228D-41DC-BDC3-95F6B47AFE20.mov.jpeg?w=300&ar=5:6&fit=crop&auto=enhance,format)
Wrist Positions at the Top of the Backswing
![Flat Shaft Pitch at P3](https://skillest.imgix.net/QvxF4QC7FopDJ3df3_1737532413_i_76AD8409-E1E9-47F3-A944-0719F8913303.mov.jpeg?w=300&ar=5:6&fit=crop&auto=enhance,format)
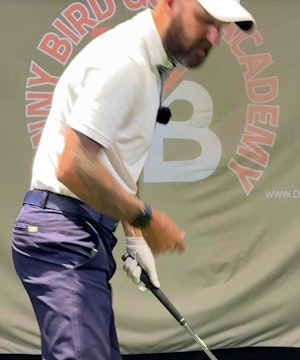
Flat Shaft Pitch at P3
![The Right Elbow Position (Backswing)](https://skillest.imgix.net/QvxF4QC7FopDJ3df3_1737532413_i_9892214C-0124-477B-BFDB-DB963CBFC5F2.mov.jpeg?w=300&ar=5:6&fit=crop&auto=enhance,format)
The Right Elbow Position (Backswing)
![A Steep Shaft Pitch at P.3](https://skillest.imgix.net/QvxF4QC7FopDJ3df3_1737532413_i_0285D088-79AA-4952-B10B-3CCF41D2B5DB.mov.jpeg?w=300&ar=5:6&fit=crop&auto=enhance,format)
A Steep Shaft Pitch at P.3
![Ideal Wrist Movement at P3](https://skillest.imgix.net/QvxF4QC7FopDJ3df3_1737532413_i_BA823023-BE04-403F-B9CE-083AE70B4929.mov.jpeg?w=300&ar=5:6&fit=crop&auto=enhance,format)
Ideal Wrist Movement at P3
![Across the Line (Top of Swing)](https://skillest.imgix.net/QvxF4QC7FopDJ3df3_1737532413_i_1A06CA36-9FB3-4E0F-8E39-B5073E0B1CDB.mov.jpeg?w=300&ar=5:6&fit=crop&auto=enhance,format)
Across the Line (Top of Swing)
![Shaft Pitch at P3 (Backswing)](https://skillest.imgix.net/QvxF4QC7FopDJ3df3_1737523284_i_D7C114C0-41DB-4FA6-88E9-C1AEA793C1FC.mov.jpeg?w=300&ar=5:6&fit=crop&auto=enhance,format)
Shaft Pitch at P3 (Backswing)
![Feet Position at Address](https://skillest.imgix.net/QvxF4QC7FopDJ3df3_1737423919_EC03A7BC-3C5B-48B7-B2B9-E84AAD894FE1.jpeg?w=300&ar=5:6&fit=crop&auto=enhance,format)
Feet Position at Address
![One-Piece Takeaway (Example)](https://skillest.imgix.net/QvxF4QC7FopDJ3df3_1737419253_i_0238D212-5107-4E52-B21E-E9765C60C0A9.mov.jpeg?w=300&ar=5:6&fit=crop&auto=enhance,format)
One-Piece Takeaway (Example)
![Hand Position at Address](https://skillest.imgix.net/QvxF4QC7FopDJ3df3_1737419253_i_A9F5AB88-464E-440A-9176-BC235AE33340.mov.jpeg?w=300&ar=5:6&fit=crop&auto=enhance,format)
Hand Position at Address
![Outside Takeaway (Backswing)](https://skillest.imgix.net/QvxF4QC7FopDJ3df3_1737419253_i_3D7BC854-7C33-4977-B488-8C5453C644C9.mov.jpeg?w=300&ar=5:6&fit=crop&auto=enhance,format)
Outside Takeaway (Backswing)
![The P System](https://skillest.imgix.net/QvxF4QC7FopDJ3df3_1737424078_1659691B-67DE-446B-80F7-F32B9775ECCE.jpeg?w=300&ar=5:6&fit=crop&auto=enhance,format)
The P System
![Inside Takeaway (Backswing)](https://skillest.imgix.net/QvxF4QC7FopDJ3df3_1737419253_i_8EB0CDBD-A2C8-4BC4-A716-64C1EC1AAFD5.mov.jpeg?w=300&ar=5:6&fit=crop&auto=enhance,format)
Inside Takeaway (Backswing)
![Pressure Distribution at Address](https://skillest.imgix.net/QvxF4QC7FopDJ3df3_1737419253_i_33F9D82F-833C-4613-9864-4D0B0221B441.mov.jpeg?w=300&ar=5:6&fit=crop&auto=enhance,format)
Pressure Distribution at Address
![Shoulder Angles at Address](https://skillest.imgix.net/QvxF4QC7FopDJ3df3_1737419253_i_0B510D30-A993-44E1-A9D1-D41C3203AF1C.mov.jpeg?w=300&ar=5:6&fit=crop&auto=enhance,format)
Shoulder Angles at Address
![Balance Points at Address](https://skillest.imgix.net/QvxF4QC7FopDJ3df3_1737267311_65AA7E34-0C82-44D2-A85B-2B8C51D0F2F2.jpeg?w=300&ar=5:6&fit=crop&auto=enhance,format)
Balance Points at Address
![Stance Width (Driver)](https://skillest.imgix.net/QvxF4QC7FopDJ3df3_1737267469_D4632E24-F584-4364-97C9-E0B1A33B642E.jpeg?w=300&ar=5:6&fit=crop&auto=enhance,format)
Stance Width (Driver)
![Knee Flex in Setup](https://skillest.imgix.net/QvxF4QC7FopDJ3df3_1737274230_F7E0AFED-1B58-4F97-BD6A-2F778E6450AF.jpeg?w=300&ar=5:6&fit=crop&auto=enhance,format)
Knee Flex in Setup
![Upper Body Tilt at Address](https://skillest.imgix.net/QvxF4QC7FopDJ3df3_1737274342_49071059-3308-42D5-8702-4AFDA6E01E12.jpeg?w=300&ar=5:6&fit=crop&auto=enhance,format)
Upper Body Tilt at Address
![Stance Width (Irons)](https://skillest.imgix.net/QvxF4QC7FopDJ3df3_1737274479_3BAA1930-68BD-4C1A-BFE4-BA8EFD63729D.jpeg?w=300&ar=5:6&fit=crop&auto=enhance,format)
Stance Width (Irons)
![Arm Hang at Setup](https://skillest.imgix.net/QvxF4QC7FopDJ3df3_1737274612_D4F4C0BB-872E-438D-AAF4-6AAED9669ECB.jpeg?w=300&ar=5:6&fit=crop&auto=enhance,format)
Arm Hang at Setup
![A Strong Grip (Example)](https://skillest.imgix.net/QvxF4QC7FopDJ3df3_1737264563_308CBAE5-386E-4FAD-B9B5-01E0DFD6182E.jpeg?w=300&ar=5:6&fit=crop&auto=enhance,format)
A Strong Grip (Example)
![A Weak Golf Grip (Example)](https://skillest.imgix.net/QvxF4QC7FopDJ3df3_1737265051_EB3C42F1-D6A7-464C-8DAE-F368E4D1FF53.jpeg?w=300&ar=5:6&fit=crop&auto=enhance,format)
A Weak Golf Grip (Example)
![How to Grip a Golf Club (My Preference)](https://skillest.imgix.net/QvxF4QC7FopDJ3df3_1737263764_1612454B-1D16-451D-90CB-D0DBB9377FC4.jpeg?w=300&ar=5:6&fit=crop&auto=enhance,format)
How to Grip a Golf Club (My Preference)
![HOW TO RECORD YOUR SWING - DISTANCE TO CAMERA FRONT ON](https://skillest.imgix.net/QvxF4QC7FopDJ3df3_1737263486_17CDC0BE-A07C-4002-89B4-9D2091340E27.jpeg?w=300&ar=5:6&fit=crop&auto=enhance,format)
HOW TO RECORD YOUR SWING - DISTANCE TO CAMERA FRONT ON
![HOW TO RECORD YOUR SWING- FRAME SPEED](https://skillest.imgix.net/QvxF4QC7FopDJ3df3_1737263367_F1CDE5B8-4421-4A2E-B8A7-F2C52EBE8EA8.jpeg?w=300&ar=5:6&fit=crop&auto=enhance,format)
HOW TO RECORD YOUR SWING- FRAME SPEED
![HOW TO POSITION THE CAMERA- IN LINE WITH BODY FRONT ON](https://skillest.imgix.net/QvxF4QC7FopDJ3df3_1737263271_C4768DFA-EF37-4B34-8255-DD808F903506.jpeg?w=300&ar=5:6&fit=crop&auto=enhance,format)
HOW TO POSITION THE CAMERA- IN LINE WITH BODY FRONT ON
![HOW TO POSITION THE CAMERA - FRONT ON HEIGHT](https://skillest.imgix.net/QvxF4QC7FopDJ3df3_1737263076_1DA642B4-6837-44D4-AA97-FE399AF9EB7E.jpeg?w=300&ar=5:6&fit=crop&auto=enhance,format)
HOW TO POSITION THE CAMERA - FRONT ON HEIGHT
![HOW TO POSITION THE CAMERA- WHERE TO SET THE LENS](https://skillest.imgix.net/QvxF4QC7FopDJ3df3_1737257032_E29CCCEB-450C-4166-A316-DB44BFA182CE.jpeg?w=300&ar=5:6&fit=crop&auto=enhance,format)
HOW TO POSITION THE CAMERA- WHERE TO SET THE LENS
![HOW TO POSITION THE CAMERA - DISTANCE FROM BALL](https://skillest.imgix.net/QvxF4QC7FopDJ3df3_1737258813_C489B40A-7BB1-46AC-A500-B23E5EFE2058.jpeg?w=300&ar=5:6&fit=crop&auto=enhance,format)
HOW TO POSITION THE CAMERA - DISTANCE FROM BALL
![HOW TO POSITION THE CAMERA - CAMERA HEIGHT](https://skillest.imgix.net/QvxF4QC7FopDJ3df3_1737258669_2E49EC84-C798-411D-9E5A-5656EAB7F83D.jpeg?w=300&ar=5:6&fit=crop&auto=enhance,format)
HOW TO POSITION THE CAMERA - CAMERA HEIGHT
Reviews
Based on 53 ratings
Overall rating
excellent trial lesson so far, will be signing up for more in the near future!
![James Smyth](/_next/image?url=https%3A%2F%2Fskillest.com%2Fimages%2Fprofile.png&w=128&q=75)
James Smyth
February 11, 2025 • Online
This lesson really helped me to understand my golf swing better and hopefully will allow me to move in a more functionally way
![Lucas Bird](/_next/image?url=https%3A%2F%2Fskillest.com%2Fimages%2Fprofile.png&w=128&q=75)
Lucas Bird
January 26, 2025 • Live
Great ciah
![Charlie Campbell](/_next/image?url=https%3A%2F%2Fskillest.imgix.net%2FaWXJYm59r9ytpBvRy_1737283716_B4C6B99E-D4E2-4FFE-B3A2-455586D166F5.jpeg%3Fw%3D250%26h%3D250%26ar%3D1%3A1%26fit%3Dcrop&w=128&q=75)
Charlie Campbell
December 3, 2024 • Live
great coach
![Charlie Campbell](/_next/image?url=https%3A%2F%2Fskillest.imgix.net%2FaWXJYm59r9ytpBvRy_1737283716_B4C6B99E-D4E2-4FFE-B3A2-455586D166F5.jpeg%3Fw%3D250%26h%3D250%26ar%3D1%3A1%26fit%3Dcrop&w=128&q=75)
Charlie Campbell
October 30, 2024 • Online
Fantastic technical knowledge of the golf swing making it very understandable and providing great insight on how to improve and what are the next steps. Highly recommend
![Connor Billings](/_next/image?url=https%3A%2F%2Fskillest.com%2Fimages%2Fprofile.png&w=128&q=75)
Connor Billings
September 21, 2024 • Online
Courses
SHORT GAME | CHIPPING COURSE | BECOME MORE CONSISTENT GREENSIDE
![SHORT GAME | CHIPPING COURSE | BECOME MORE CONSISTENT GREENSIDE](/_next/image?url=https%3A%2F%2Fskillest-content.imgix.net%2FQvxF4QC7FopDJ3df3_1725783823_97622AF8-5076-474C-9327-FFAC858771C9.jpeg%3Fw%3D600%26ar%3D16%3A9%26fit%3Dcrop%26fmt%3Dauto&w=3840&q=75)
THE BUNKER COURSE | MASTER BUNKER SHOTS
![THE BUNKER COURSE | MASTER BUNKER SHOTS](/_next/image?url=https%3A%2F%2Fskillest-content.imgix.net%2FQvxF4QC7FopDJ3df3_1731924963_A223C0E3-62D6-44EC-B4D3-80B8F835F611.jpeg%3Fw%3D600%26ar%3D16%3A9%26fit%3Dcrop%26fmt%3Dauto&w=3840&q=75)
Frequently asked questions
Unlock your potential with world-class golf coaching